# Voice AI Chat Widget

> man-like voice in your GHL Customer Care chat widget—no phone numbers or downloads. WebRTC streaming, reCAPTCHA protection, and a clear non-recording notice.

- Source: https://docs.ghlcustomercare.com/docs/sites/chat-widget/voice-ai-chat-widget
- Section: Sites / Chat Widget
- Reading time: 4 min
- Images: 11, each explained below
- Modified on Tue, 13 Jan at 3:18 PM

---
Deliver human-like voice interactions directly in your GHL Customer Care Chat Widget—no phone numbers, downloads, or extra setup—so you can capture and qualify more leads instantly.

**IMPORTANT**: This feature is currently available in **Labs** and needs to be **enabled by Agency for Sub-accounts**. For more information, refer to [Labs Features - Complete Overview](https://docs.ghlcustomercare.com/docs/agency-view/agency-settings/labs-features-complete-overview)

---

**TABLE OF CONTENTS**

-   [What is the Voice AI Chat Widget?](#what-is-the-voice-ai-chat-widget)
-   [Key Benefits of the Voice Widget](#key-benefits-of-the-voice-widget)
-   [Voice-Only Chat Type](#voice-only-chat-type)
-   [How to Change the AI Agent Name](#how-to-change-the-ai-agent-name)
-   [Built-In Call-Recording Notice](#built-in-call-recording-notice)
-   [reCAPTCHA Protection](#recaptcha-protection)
-   [Browser-Based Engagement](#browser-based-engagement)
-   [Concurrent Call Limit](#concurrent-call-and-agent-limit)
-   [Supported Features](#supported-features)
-   [How to Set Up the Voice Widget](#how-to-set-up-the-voice-widget)
-   [Frequently Asked Questions](#frequently-asked-questions)
-   [Related Articles](#related-articles)

---

## **What is the Voice AI Chat Widget?**

The Voice AI Chat Widget is a new widget type that lets website visitors hold live, microphone-based conversations with an AI agent entirely inside the browser. Instead of launching a phone call, the conversation streams through WebRTC, creating a friction-free, voice-first experience that feels natural and immediate.

---

## **Key Benefits of the Voice Widget**

Voice AI turns your standard chat bubble into a real-time conversation booth:

-   Zero friction – visitors speak instantly without dialing a number or installing an app.
-   Human-like engagement – natural speech keeps prospects talking longer and sharing more details.
-   Higher conversion – real-time voice qualifies and books leads while interest is hot.
-   Brandable agent name – display a friendly persona (e.g., “BuilderAi”) right in the widget.
-   Built-in security – reCAPTCHA throttles abuse; a call-recording disclaimer ensures compliance.

---

## **Voice-Only Chat Type**

Voice-only mode streams audio through the visitor’s mic and speakers so the entire call lives inside the chat window—no PSTN or VoIP connection required. This makes it ideal for quick demos, support triage, or hands-free sales conversations. 

---

## **Built-In Call-Recording Notice**

To keep expectations clear, the widget surfaces a banner that reads “All voice AI calls made using chat widgets cannot be recorded.” This transparency protects both you and your visitors from compliance confusion. 

![Built-In Call-Recording Notice (image 1 of 11)](https://s3.amazonaws.com/cdn.freshdesk.com/data/helpdesk/attachments/production/155055869030/original/y7dhmiDGwsAFK3nECxwOCxTCw8AFOk6d7w.png)

**Built-In Call-Recording Notice (image 1 of 11)**

This screenshot appears in the "Built-In Call-Recording Notice" section of "Voice AI Chat Widget". The text alongside this image reads: To keep expectations clear, the widget surfaces a banner that reads “All voice AI calls made using chat widgets cannot be recorded.” This transparency protects both you and your visitors from compliance confusion. Immediately after, the guide continues: If a visitor connects or disconnects 10 times within 60 seconds, the system prompts Google reCAPTCHA to confirm they’re human, stopping bot loops and malicious toll-free abuse before it starts.
- What this covers: To keep expectations clear, the widget surfaces a banner that reads “All voice AI calls made using chat widgets cannot be recorded.” This transparency protects both you and your visitors from compliance confusion.
- Next: If a visitor connects or disconnects 10 times within 60 seconds, the system prompts Google reCAPTCHA to confirm they’re human, stopping bot loops and malicious toll-free abuse before it starts.

---

## **reCAPTCHA Protection**

If a visitor connects or disconnects 10 times within 60 seconds, the system prompts Google reCAPTCHA to confirm they’re human, stopping bot loops and malicious toll-free abuse before it starts.

![reCAPTCHA Protection (image 2 of 11)](https://s3.amazonaws.com/cdn.freshdesk.com/data/helpdesk/attachments/production/155055868854/original/GyZ2Wnh0gLgHakAU6m9RdswMxwbZaGn2zg.png)

**reCAPTCHA Protection (image 2 of 11)**

This screenshot appears in the "reCAPTCHA Protection" section of "Voice AI Chat Widget". The text alongside this image reads: If a visitor connects or disconnects 10 times within 60 seconds, the system prompts Google reCAPTCHA to confirm they’re human, stopping bot loops and malicious toll-free abuse before it starts. Immediately after, the guide continues: Because everything runs in-browser via WebRTC, there’s no telephony setup, SIP trunk, or softphone to configure. Agencies can embed the widget anywhere a normal GHL Customer Care chat bubble fits—websites, funnels, blogs, or the Client….
- How to confirm: If a visitor connects or disconnects 10 times within 60 seconds, the system prompts Google reCAPTCHA to confirm they’re human, stopping bot loops and malicious toll-free abuse before it starts.
- Next: Because everything runs in-browser via WebRTC, there’s no telephony setup, SIP trunk, or softphone to configure. Agencies can embed the widget anywhere a normal GHL Customer Care chat bubble fits—websites, funnels, blogs, or the Client Portal.

---

## **Browser-Based Engagement**

Because everything runs in-browser via WebRTC, there’s no telephony setup, SIP trunk, or softphone to configure. Agencies can embed the widget anywhere a normal GHL Customer Care chat bubble fits—websites, funnels, blogs, or the Client Portal.

---

## **Concurrent Call  and Agent Limit**

You can currently create **up** **to 100 Voice AI agents**, allowing room for experiments, production setups, and specialized workflows.

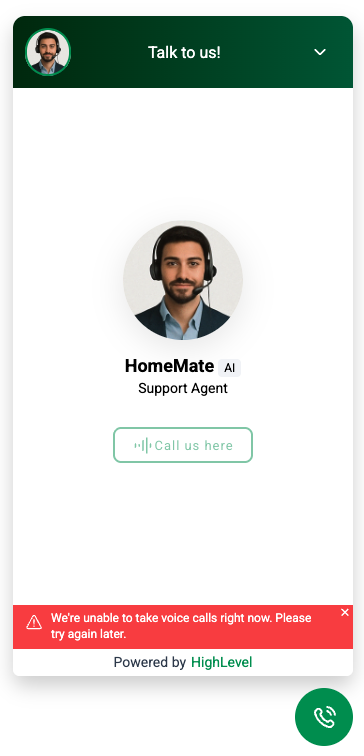
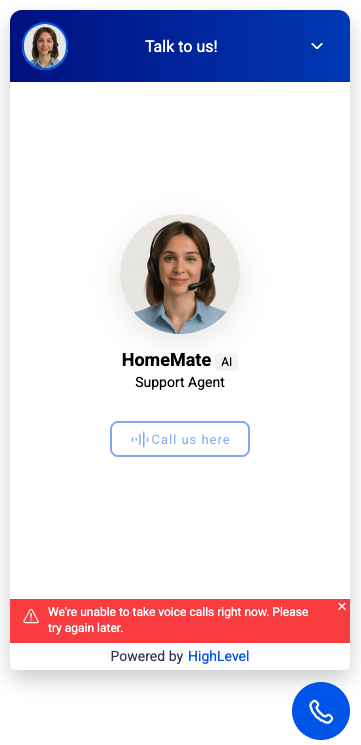
The number of concurrent calls is **capped at 20.** Call #21 will trigger the red banner shown in the examples below. Calls in other locations are unaffected as they each have their own 20 call limit. This safeguard prevents quality degradation when multiple website visitors call at once.

**To Check Service Status:** Visit status.https://ghlcustomercare.com to confirm any ongoing outages.

<table class="fr-no-borders" style="max-width: 100%; font-weight: 400; text-align: left; width: 718px"><tbody><tr><td style="min-width: 5px; width: 359px"><p>
![Concurrent Call and Agent Limit (image 3 of 11)](https://s3.amazonaws.com/cdn.freshdesk.com/data/helpdesk/attachments/production/155058126603/original/2YTUbW0_7BQm9W-khyUe6UV6XJR4o4GJZQ.png)

**Concurrent Call and Agent Limit (image 3 of 11)**

This screenshot appears in the "Concurrent Call and Agent Limit" section of "Voice AI Chat Widget". The text alongside this image reads: To Check Service Status: Visit status.https://ghlcustomercare.com to confirm any ongoing outages. Immediately after, the guide continues: Start a voice call with the AI agent. Mute the agent during conversation. Provide contact information during the call. End or restart a call when needed.
- How to confirm: To Check Service Status: Visit status.https://ghlcustomercare.com to confirm any ongoing outages.
- Controls: up, to 100 Voice AI agents, capped at 20.
- Next: Start a voice call with the AI agent. Mute the agent during conversation. Provide contact information during the call. End or restart a call when needed.
</p></td><td style="min-width: 5px; width: 359px"><p>
![Concurrent Call and Agent Limit (image 4 of 11)](https://s3.amazonaws.com/cdn.freshdesk.com/data/helpdesk/attachments/production/155058126604/original/wlOxLhMVyFggO0y_gXXAWRWAO4brlANLHw.png)

**Concurrent Call and Agent Limit (image 4 of 11)**

This screenshot appears in the "Concurrent Call and Agent Limit" section of "Voice AI Chat Widget". The text alongside this image reads: To Check Service Status: Visit status.https://ghlcustomercare.com to confirm any ongoing outages. Immediately after, the guide continues: Start a voice call with the AI agent. Mute the agent during conversation. Provide contact information during the call. End or restart a call when needed.
- How to confirm: To Check Service Status: Visit status.https://ghlcustomercare.com to confirm any ongoing outages.
- Controls: up, to 100 Voice AI agents, capped at 20.
- Next: Start a voice call with the AI agent. Mute the agent during conversation. Provide contact information during the call. End or restart a call when needed.
</p></td></tr></tbody></table>

---

## **Supported Features**

-   Start a voice call with the AI agent.
-   Mute the agent during conversation.
-   Provide contact information during the call.
-   End or restart a call when needed.

**Note**: Call transfer is not yet supported while in beta.

---

## **How to Set Up the Voice Widget**

A correct setup ensures that the Voice Widget works smoothly on your website. The process is simple and requires adding a script to your site’s code.

1\. Navigate to**Sites → Chat Widget** → **New** → **Voice AI** as the widget type.

![How to Set Up the Voice Widget (image 5 of 11)](https://s3.amazonaws.com/cdn.freshdesk.com/data/helpdesk/attachments/production/155055871597/original/mx3uGUCZPCRhUwDY74ExLLKIyM5mUcZM9A.png)

**How to Set Up the Voice Widget (image 5 of 11)**

This screenshot appears in the "How to Set Up the Voice Widget" section of "Voice AI Chat Widget". The text alongside this image reads: 1. Navigate to Sites → Chat Widget → New → Voice AI as the widget type. Immediately after, the guide continues: 2. Locate the Get Code option and copy the provided code.
- What to fill in: 1. Navigate to Sites → Chat Widget → New → Voice AI as the widget type.
- Controls: Sites → Chat Widget, New, Voice AI, Get Code, Wix, Shopify,, Squarespace, Note
- Next: 2. Locate the Get Code option and copy the provided <script> code.

Full procedure:

1. For custom-coded sites, place it in the <head> or <footer> section.
2. For platforms like Wix, Shopify, and Squarespace, use their custom code embed feature.

2\. Locate the **Get Code** option and copy the provided`<script>`code.

![How to Set Up the Voice Widget (image 6 of 11)](https://s3.amazonaws.com/cdn.freshdesk.com/data/helpdesk/attachments/production/155055871718/original/qN1YE35rbauwOgS5BDAh661pGpXP75kk3g.png)

**How to Set Up the Voice Widget (image 6 of 11)**

This screenshot appears in the "How to Set Up the Voice Widget" section of "Voice AI Chat Widget". The text alongside this image reads: 2. Locate the Get Code option and copy the provided code. Immediately after, the guide continues: 3. Paste the script into your website.
- What to copy: 2. Locate the Get Code option and copy the provided <script> code.
- Controls: Sites → Chat Widget, New, Voice AI, Get Code, Wix, Shopify,, Squarespace, Note
- Next: 3. Paste the script into your website:

Full procedure:

1. For custom-coded sites, place it in the <head> or <footer> section.
2. For platforms like Wix, Shopify, and Squarespace, use their custom code embed feature.

3\. Paste the script into your website:

-   For custom-coded sites, place it in the`<head>`or`<footer>`section.
    
-   For platforms like**Wix, Shopify,** and **Squarespace**, use their custom code embed feature.
    

**Note**: Save and publish your changes. Test the widget by visiting your live site and starting a voice call.

![How to Set Up the Voice Widget (image 7 of 11)](https://s3.amazonaws.com/cdn.freshdesk.com/data/helpdesk/attachments/production/155055872079/original/hfsxhBnsIHkfPZHnsibA6mn8OftmfcMVEQ.png)

**How to Set Up the Voice Widget (image 7 of 11)**

This screenshot appears in the "How to Set Up the Voice Widget" section of "Voice AI Chat Widget". The text alongside this image reads: For custom-coded sites, place it in the or section. For platforms like Wix, Shopify, and Squarespace, use their custom code embed feature. Immediately after, the guide continues: Give your AI a friendly, on-brand identity by setting a display name in the widget builder (Sites > Chat Widgets > Agent tab). The chosen name appears on every voice reply, reinforcing trust and professionalism.
- What this covers: For custom-coded sites, place it in the <head> or <footer> section. For platforms like Wix, Shopify, and Squarespace, use their custom code embed feature.
- Controls: Sites → Chat Widget, New, Voice AI, Get Code, Wix, Shopify,, Squarespace, Note
- Next: Give your AI a friendly, on-brand identity by setting a display name in the widget builder (Sites > Chat Widgets > Agent tab). The chosen name appears on every voice reply, reinforcing trust and professionalism.

Full procedure:

1. For custom-coded sites, place it in the <head> or <footer> section.
2. For platforms like Wix, Shopify, and Squarespace, use their custom code embed feature.

---

## **How to Change the AI Agent Name**

Give your AI a friendly, on-brand identity by setting a display name in the widget builder (Sites > Chat Widgets > Agent tab). The chosen name appears on every voice reply, reinforcing trust and professionalism.

Changing the name of your Chat Widget Agent is easy and can be done directly in the web chat builder! To change the name, follow these steps:

#### **Step 1:** Navigate to Chat Widgets

From your location dashboard, go to **Sites → Chat Widgets**

![Step 1: Navigate to Chat Widgets (image 8 of 11)](https://s3.amazonaws.com/cdn.freshdesk.com/data/helpdesk/attachments/production/155058034812/original/lA_hzlt8-FeAZUKgtGc2I3y7JFayR4Q6GA.jpeg)

**Step 1: Navigate to Chat Widgets (image 8 of 11)**

This screenshot appears in the "Step 1: Navigate to Chat Widgets" section of "Voice AI Chat Widget". The text alongside this image reads: From your location dashboard, go to Sites → Chat Widgets. Immediately after, the guide continues: Click on the widget to open the editor.
- What this covers: From your location dashboard, go to Sites → Chat Widgets
- Controls: Sites → Chat Widgets
- Next: Click on the widget to open the editor

#### **Step 2:** Open Your Widget

Click on the widget to open the editor

![Step 2: Open Your Widget (image 9 of 11)](https://s3.amazonaws.com/cdn.freshdesk.com/data/helpdesk/attachments/production/155058034815/original/_dqTiUJq4rhJZswNhzRYnZGUz8BzCqnEmw.jpeg)

**Step 2: Open Your Widget (image 9 of 11)**

This screenshot appears in the "Step 2: Open Your Widget" section of "Voice AI Chat Widget". The text alongside this image reads: Click on the widget to open the editor. For context, this section explains: Changing the name of your Chat Widget Agent is easy and can be done directly in the web chat builder! To change the name, follow these steps. Immediately after, the guide continues: Navigate to the Agent tab Use the Voice AI Agent Name box to enter a new name for the agent.
- What to click: Click on the widget to open the editor
- Next: Navigate to the Agent tab Use the Voice AI Agent Name box to enter a new name for the agent

#### **Step 3:** Update Name

-   Navigate to the **Agent** tab
-   Use the **Voice AI Agent Name** box to enter a new name for the agent

![Step 3: Update Name (image 10 of 11)](https://s3.amazonaws.com/cdn.freshdesk.com/data/helpdesk/attachments/production/155058034814/original/-jaABwYrUXAv_Bnpog3TfxpaHAF7euZ32g.jpeg)

**Step 3: Update Name (image 10 of 11)**

This screenshot appears in the "Step 3: Update Name" section of "Voice AI Chat Widget". The text alongside this image reads: Navigate to the Agent tab Use the Voice AI Agent Name box to enter a new name for the agent. Immediately after, the guide continues: Once the name has been changed, apply your changes by clicking the blue Save button in the upper right corner.
- Where to go: Navigate to the Agent tab Use the Voice AI Agent Name box to enter a new name for the agent
- Controls: Agent, Voice AI Agent Name
- Next: Once the name has been changed, apply your changes by clicking the blue Save button in the upper right corner.

Full procedure:

1. Navigate to the Agent tab
2. Use the Voice AI Agent Name box to enter a new name for the agent

#### **Step 4:** Save Changes

Once the name has been changed, apply your changes by clicking the blue **Save** button in the upper right corner.

![Step 4: Save Changes (image 11 of 11)](https://s3.amazonaws.com/cdn.freshdesk.com/data/helpdesk/attachments/production/155058034813/original/xw6wM7rf-ipSSNXBhdAu4Wp2Fm2vvWJeyA.jpeg)

**Step 4: Save Changes (image 11 of 11)**

This screenshot appears in the "Step 4: Save Changes" section of "Voice AI Chat Widget". The text alongside this image reads: Once the name has been changed, apply your changes by clicking the blue Save button in the upper right corner. Immediately after, the guide continues: Q: Do visitors have to grant mic permission every time?
- How to confirm: Once the name has been changed, apply your changes by clicking the blue Save button in the upper right corner.
- Controls: Save
- Next: Q: Do visitors have to grant mic permission every time?

---

## **Frequently Asked Questions**

**Q: Do visitors have to grant mic permission every time?**

Most modern browsers remember permission after the first allow, but private/incognito sessions will ask again.

**Q: Can I offer both text chat and Voice AI in one widget?**

Not yet. Voice AI is currently a dedicated “Voice-Only” widget type. Use separate widgets (text vs. voice) if you need both.

**Q: Is the audio recorded anywhere in GHL Customer Care?**

No. Voice AI Chat Widget calls are streamed only; recording is disabled to comply with privacy regulations.

**Q: What happens if the visitor’s connection drops?**

The call ends gracefully. The visitor can click the mic icon to reconnect; repeated drops trigger reCAPTCHA.

**Q: Does Voice AI work on mobile browsers?**

Yes—Safari (iOS 16+), Chrome, and Edge support in-browser audio as long as the user allows microphone access. 

**Q: Can agencies set different AI agents for different pages?**

Absolutely. Create multiple Voice AI widgets—each with its own agent persona—and embed the appropriate script on each page.

---

## **Related Articles**

-   [Add GHL Customer Care’s Chat Widget to Your Wix Website](https://docs.ghlcustomercare.com/docs/sites/chat-widget/add-ghl-customer-care-s-chat-widget-to-your-wix-website)
    
-   [How to Customize Your Chat Widget](https://docs.ghlcustomercare.com/docs/sites/chat-widget)
    
-   [Interactive Voice Response (IVR) Guide: Triggers & Actions](https://docs.ghlcustomercare.com/docs/workflows/developer-resources/interactive-voice-response-ivr-guide-triggers-actions)
    
-   [How to Embed External Content on a Dashboard](https://docs.ghlcustomercare.com/docs/dashboards/dashboard-widgets/how-to-embed-external-content-on-a-dashboard)
    
-   How to Use Multiple Chat Widgets

---

Documentation for GHL Customer Care. Support: support@ghlcustomercare.com